
20/02/25
JWTAlgConfusion&RaceCondition
2FA Bypass | NextGen Defence CTF 2025
Thanks for sharing!
بِسْمِ اللَّهِ الرَّحْمَنِ الرَّحِيمِ

I know your browser history
Well hello and welcome back to another new Write-Up. This time I was playing solo on "NextGen Defence CTF 2025", it had some pretty interesting challenges. Managed to get 4 out of 8 in Web category. In this write-up, I will walk you through one of them.
Before we start make sure to give it a shot yourself, you can find the challenge here. Let's get started.
JWT
When you open the source code, you will get 2 files:
index.js & customcrypto.js. Let's start by looking at customcrypto.js:Note: I will not put the whole code here due to its length, just the important parts. You can download the full challenge from the link above.
This file main purpose is basically generating a JWT token and verifying it.
The interesting part is it checks the algorithm used in the token and acts accordingly:

In these situation if we can get the public key used to validate the token, we can forge our own token and bypass the verification. This is called JWT Algorithm Confusion.
JWT Algorithm Confusion
There are these 2 main types of algorithms used in JWT:
HS256 & RS256.RS256 is an asymmetric algorithm, which means it uses a public/private key pair. The server has both keys.- Priavate Key -> used for signing the JWT token
- Public Key -> used to verify the JWT token
Normally if the public key is available for us, we can't do much, because we don't have the private key to sign our own token.
On the other hand,
HS256 is a symmetric algorithm, which means it uses a single key for both signing and verifying the JWT token.And here the problem arises. We can forge our own token and sign it with the same key used by the server to verify it.
We have 2 conditions:
- The server is not checking the algorithm used in the token and simply verifies based on it.
- We have the public key.
Main Application
Now let's look at the
index.js file! When you first open it, you will find the public key waiting for you:And here you have it, your first vulnerability, let's continue and see how we can use it.
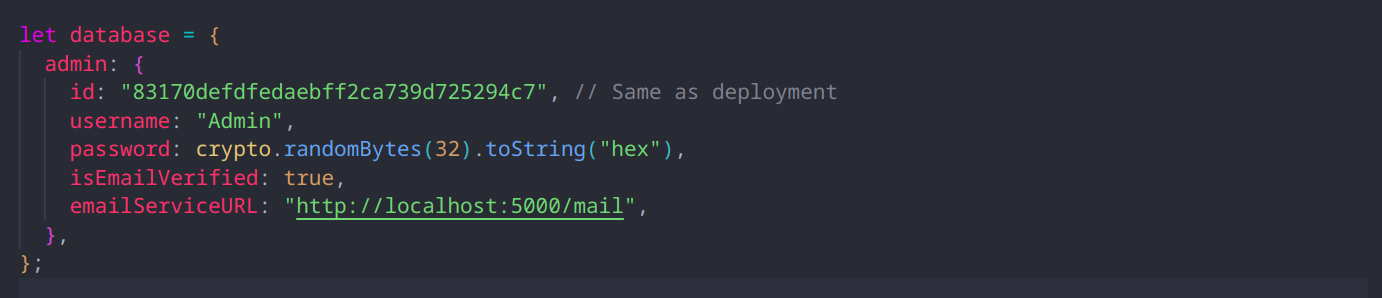
To sum things up, we have an admin object and the following end points:
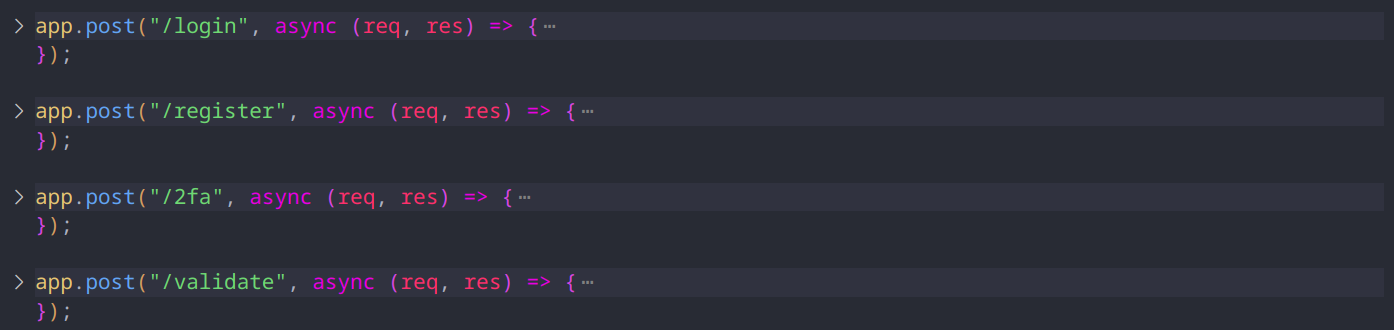
In
/register end point we can register a new user which add a new object to the database, I suspected Proto Type Pollution here, but it had a white list and used Object.freeze(Object.prototype); at the top to prevent it.In
/login end point we have no thing special, just a simple login that returns a JWT token with your id in the token payload (data).Now to
/2fa end point:It validates your token and checks if you have the admin id.
Notice that we can use theJWT Algorithm Confusionvulnerability here to bypass the admin id validation.
It also sends the 2FA code to
emailServiceURL, could it have a SSRF vulnerability to leak the code?Let's check
/validate end point:Here is also validates your token and checks if you have the admin id. And as you can see, we will retrieve the flag if we have the correct 2FA code (which is being read from a file - this is important). So How can we get it?
The
SSRF that I mentioned earlier won't work, and here is why:The only place I can add my own controlled URL is when I register.
emailServiceURL is in the white list:But the issue here that I would have to use my own token (which has another id than the admin's) in order to make the server use this controlled URL, but as you can see down there, it checks for the admin
id before it sends the 2FA code, so we have to figure out another way.Race Condition
Whenever you see something that takes time (e.g. database queries, file operations, etc.) in a web application, you should think of
Race Condition.Race Condition simply happens when two or more actions try to happen at the same time, and one may depend on another, causing unexpected results.
Let's take a look at the
/2fa end point again especially the part where it makes the file:Let's break it down:
- It opens a file.
- Generates a random string.
- Validates the
emailServiceURL. - Sends the 2FA code to the
emailServiceURL. - Writes the 2FA code to the file.
- Closes the file.
Notice that the file is opened, then some operations occur, during this time the file is empty, which means the value inside it is
null in this short period of time.Remember that the 2FA is being read from a file up there in
/validate end point? here is the corressponding part:So if we can send
null payload to /validate end point in the same time that the file is opened but not yet written, we can bypass the 2FA validation.And that's our solution! Now Let's start the exploitation.
Exploitation
First Let's forge our own token with the
HS256 algorithm:output:
Now simply send a POST request to
/2fa end point and /validate end point right after each other using burp tab group feature (I won't include it here to keep it short, you can simply look it up)The second request to
/validate will have null payload as follows:Note: It might not work from the first time, but keep trying and you will get it evantually.
That concludes it! It was a solid 3:30 hours writing this write-up 🥀, hope you enjoyed it. If you have any questions or feedback, feel free to reach out to me on X | Twitter.
Happy Hacking! 🚀
Tags:

